Should I Leave A Gap Under Skirting Boards?
Skirting boards have long been essential in home construction, decoration, and renovation. They’re not just a finishing touch at the base of your walls; they serve practical purposes. Historically, high skirting boards were used in Victorian homes to prevent dampness caused by poorly installed floors and wet plastered walls. It’s a great example of how form and function come together.
Materials for Skirting Boards
Skirting boards come in a range of materials, from softwood and hardwood to medium-density fibreboard (MDF). Each material has its own benefits, but choosing the right one is only part of the equation. Proper installation is key to achieving the best results and ensuring the boards look their best in your home.
Why Skirting Boards Are Better Than Alternatives
While some may be tempted to replace skirting boards with alternatives like exposed brick or plaster finishes, nothing quite compares to the function that skirting boards offer. They protect the walls, hide imperfections, and provide a clean finish to the floor.
Should You Leave a Gap Under Skirting Boards?
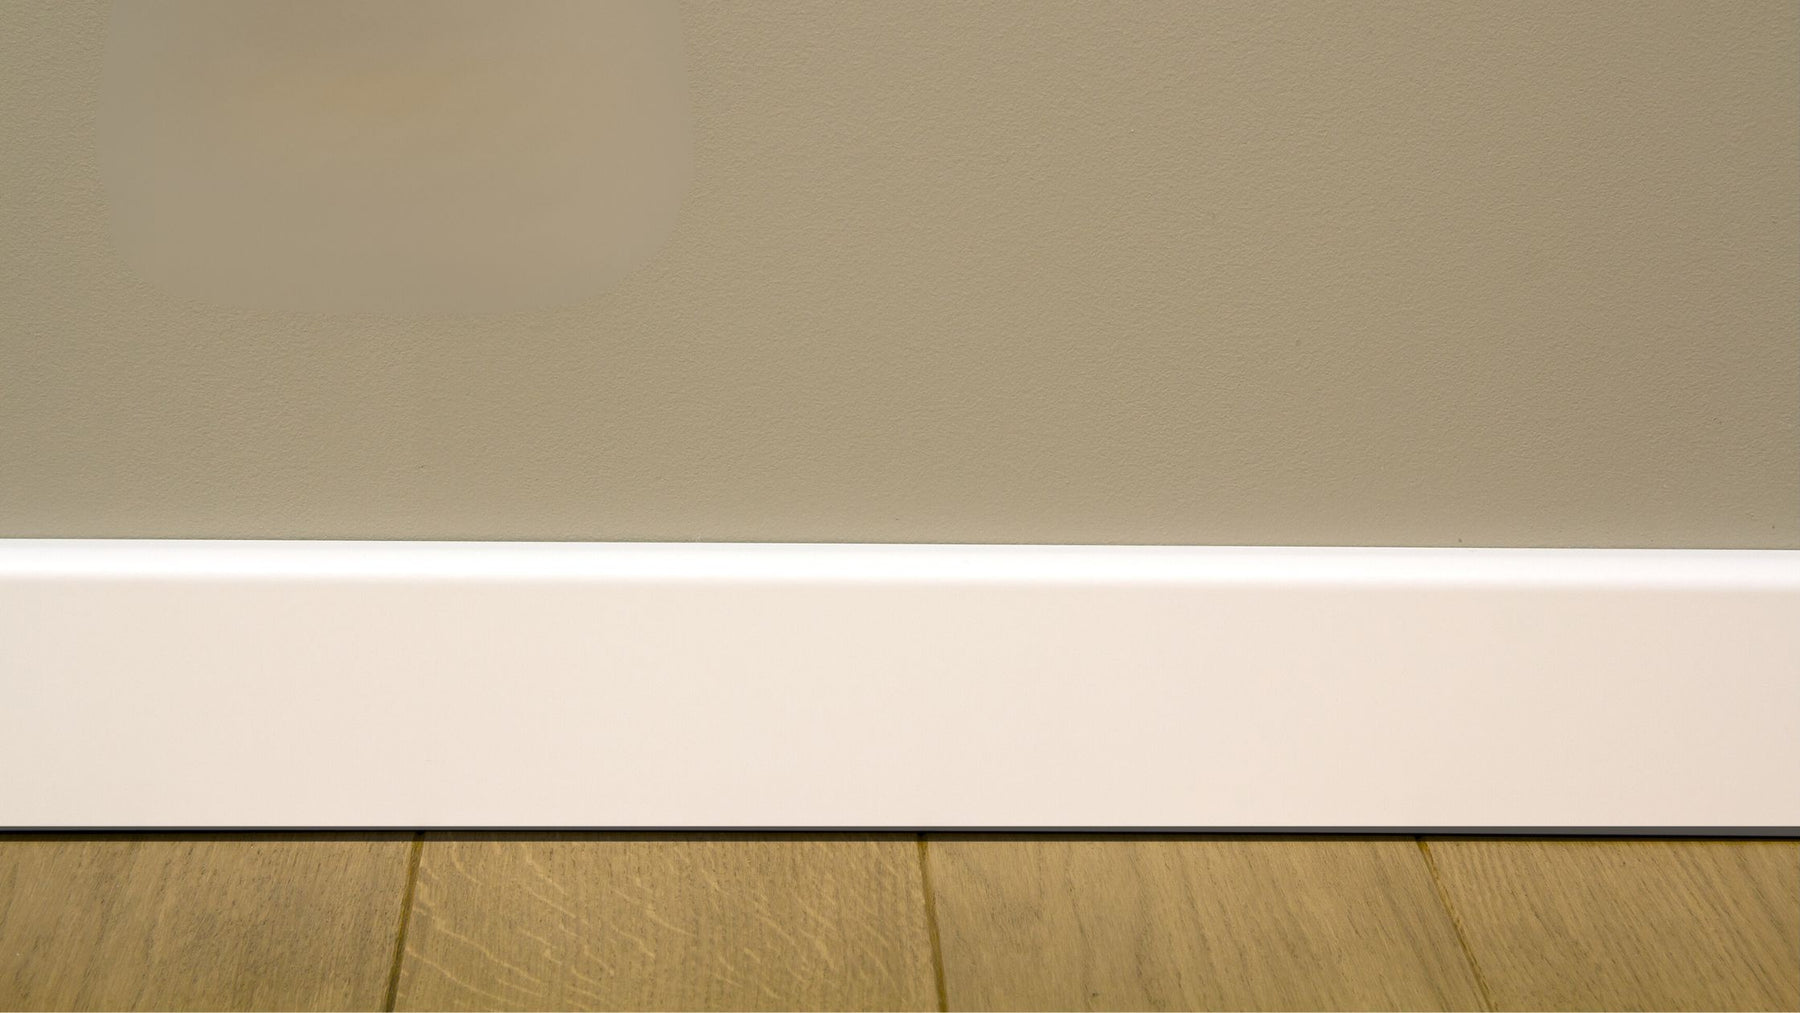
One of the most debated questions is whether you should leave a gap under your skirting boards. Contrary to popular belief, leaving a gap is important for several reasons.
A gap under the skirting boards allows air to circulate, preventing the buildup of moisture. This keeps your home cooler and drier, which in turn helps protect the structural integrity of the building. Plus, it makes future maintenance easier.
The Consequences of Not Leaving a Gap
Not leaving a gap under your skirting boards can lead to a range of problems. Without proper airflow, you may experience dampness, mould, and swelling of wooden boards over time. Skipping the gap can also cause aesthetic issues, making your home look less polished.
How to Install Skirting Boards with the Right Gap
Installing skirting boards with the correct gap isn’t difficult, but it does require precision. Make sure to take accurate measurements, use the right tools, and follow a step-by-step guide. And don’t forget to observe safety precautions during installation!
Installing skirting boards with the right gap is a straightforward task if you follow these simple steps. The gap is crucial for airflow and moisture control, so it's important to get it right. Here’s how:
1. Prepare Your Tools and Materials
Ensure you have everything you need before starting:
- Skirting boards
- Measuring tape
- Pencil for marking
- Saw (or mitre saw for more precision)
- Caulk gun (if sealing)
- Spacer blocks (to set the gap consistently)
- Adhesive or nails (for fixing the skirting boards)
- Safety gear (gloves and safety glasses)
2. Measure the Area
Before cutting the skirting boards, measure the length of the walls where they will be installed. Mark the position where each board will be placed, ensuring you take into account the gap you want to leave at the bottom.
3. Cut Your Skirting Boards
Once you have your measurements, cut the skirting boards to fit your walls. Make sure to use a saw that can create straight, clean cuts. If you want more precision, you can use a mitre saw for angled cuts, especially for corners.
4. Position Spacer Blocks
To create a consistent gap, use spacer blocks at the bottom of the skirting boards. These blocks should be placed between the wall and the bottom of the skirting board to create the desired gap. The gap typically ranges from 5mm to 10mm, depending on your preferences and the size of the space. You can also use small pieces of scrap wood as spacers.
5. Fix the Skirting Board in Place
Once the spacer blocks are in position, hold the skirting board against the wall, making sure the spacer blocks are aligned with the wall and the floor. Use adhesive to attach the board to the wall, or use nails if you prefer a more secure hold. Make sure the skirting board stays firmly in place while the adhesive sets or while you finish nailing it.
6. Check the Gap Consistency
As you install the skirting boards along the wall, regularly check that the gap remains consistent. Adjust the spacer blocks if needed to maintain an even gap. This step is crucial to ensure uniform airflow and moisture control.
7. Seal and Finish
If you want to seal the gap for a cleaner look, use a caulk gun with a silicone sealant that matches the color of your skirting boards. Apply a thin line of sealant along the bottom edge, smoothing it out with your finger or a smoothing tool. This will prevent dirt from collecting in the gap and ensure a finished appearance.
8. Allow the Adhesive or Sealant to Set
Let the adhesive or caulk cure fully before cleaning or touching the boards. This ensures that the skirting board stays firmly in place and the gap remains intact.
9. Inspect the Final Result
Once everything is in place, inspect the installation. Make sure the gap is consistent, the boards are securely attached, and the final finish looks neat. If necessary, make touch-ups with paint or additional sealant.
By following these steps, you’ll successfully leave a gap under your skirting boards to promote airflow and prevent dampness, while ensuring your installation looks clean and professional.
Potential Issues with Gaps Under Skirting Boards
While gaps have their benefits, they can also cause some issues. These include pest problems, uneven edges, air drafts in colder months, and challenges with cleaning. However, these issues can be addressed with simple solutions.
- Pests: Use eco-friendly pest control methods to keep your space free of critters.
- Air Drafts: Insulate the gaps with thermal sealants to reduce drafts, conserve energy, and lower your carbon footprint.
- Cleaning: Regular vacuuming can help keep gaps free from dust and dirt.
Why You Should Understand Gaps Under Skirting Boards
Understanding the role of gaps under your skirting boards is crucial for any home improvement project. Whether you’re a DIY enthusiast, builder, or just interested in home renovations, knowing how to manage the gap can help prevent problems and improve the overall look and feel of your home.
So, if you’re looking to perfect your renovation, don’t overlook the importance of the gap under your skirting boards. It can help with mould prevention, air circulation, and overall aesthetics—making your home more comfortable and visually appealing.
Ready to start your next project? It’s time to embrace the gap and get it right!


