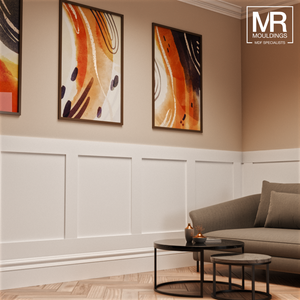
How to Fit Beading: A Step-by-Step Trim Installation Guide
Beading might be one of the smallest elements in a room, but it can make a huge difference to the final finish. Whether you're covering gaps between flooring and skirting, adding detail around a window frame, or finishing off panelling, fitting beading correctly is key to a professional-looking result.
To fit beading, measure and cut it to size using a mitre saw, then fix it in place with grab adhesive or panel pins. Caulk any gaps for a smooth finish and paint or stain if required. Always secure beading to walls or skirting, not the floor.
At MR Mouldings, we supply a wide range of MDF, softwood and hardwood beading, and we’re often asked by customers how to install it. The good news? It’s more straightforward than you might think. With a few tools and a little care, you can achieve a neat, long-lasting finish yourself.
What Is Beading?
Beading is a narrow length of trim or moulding used to create decorative or functional edges. It’s commonly fitted along skirting boards, door frames, and panelled walls to hide small gaps, add visual detail, or smooth transitions between surfaces.
At MR Mouldings, our beading profiles are available in:
-
Moisture-resistant MDF – perfect for painting and resistant to warping
-
Softwood – a classic choice for painted or stained finishes
-
Hardwood – ideal for premium interiors with a visible grain
What You’ll Need to Fit Beading
Before you begin, make sure you have the following tools and materials:
-
Beading (cut to your approximate required lengths)
-
Tape measure
-
Pencil and ruler
-
Mitre box or mitre saw
-
Grab adhesive (or panel pins for hardwood)
-
Caulking gun and decorators' caulk
-
Sandpaper or sanding block
-
Primer/paint or wood finish (if needed)
-
Damp cloth and masking tape (optional)
Step-by-Step: How to Fit Beading
1. Measure the Area
Start by carefully measuring the perimeter where you plan to install the beading, whether it's around a floor, door, or wall panel. Mark your measurements clearly and allow for corners, doorways or irregular spaces.
💡 Tip: Always order a little extra to allow for errors or offcuts, usually 5–10% more than your measured length.
2. Cut the Beading to Size
Using a mitre box or mitre saw, cut the beading to length. For corners, you'll need 45° angles to ensure a clean join. Always dry-fit your pieces before fixing to make sure they align properly.
-
For straight runs: cut square ends
-
For corners: mitre both ends at 45°
-
Sand any rough edges gently for a smooth finish
3. Apply Adhesive or Fixing
For MDF or softwood beading, a strong grab adhesive is usually all you need. Apply a bead of glue to the back of the trim, press it firmly into place, and wipe away any excess.
For hardwood, or where extra security is needed, use panel pins in addition to adhesive, just be sure to countersink them slightly so you can fill and paint over them later.
⚠️ Avoid fixing into the flooring, always attach beading to the wall or skirting board.
4. Caulk the Edges (Optional)
Once the beading is fixed in place, apply decorators' caulk to seal any fine gaps between the trim and the wall or skirting. This step ensures a neat, seamless appearance, especially if you plan to paint over the beading.
Use a caulking gun to apply a small bead, then smooth it with your finger or a damp cloth.
5. Paint or Finish
If using MDF beading, it will likely need priming and painting after installation. You can:
-
Pre-prime before fitting (recommended for speed)
-
Touch up once fitted and caulked
For softwood, you can either paint or stain, depending on your interior style. Hardwood beading is usually left natural or oiled for a premium finish; just make sure it’s fully sealed to prevent moisture damage.
Where to Fit Beading
Beading is highly versatile and works well in several areas of the home:
-
Skirting Board Beading: Hides gaps between flooring and existing skirting
-
Flooring Beading: Used when laying laminate or wood floors to cover expansion spaces
-
Door Frame Beading: Finishes edges and adds visual definition
-
Window Beading: Secures glazing or adds detailing to frames
-
Wall Panelling: Adds depth and shape to decorative panels or wainscoting
Expert Tips From MR Mouldings
We’ve worked with thousands of customers across domestic and trade projects. Here are a few expert tips to help your installation go smoothly:
-
Acclimatise timber: Let softwood or hardwood adjust to the room temperature before fitting
-
Use painter’s tape: Protect flooring or walls while applying glue or paint
-
Finish before fitting: Pre-paint or stain in advance, then touch up after installation
-
Check your mitres twice: A clean corner makes all the difference to the final look
Why Choose Beading from MR Mouldings?
We’re not just a supplier, we’re timber moulding specialists. Here’s why customers across the UK choose us:
-
Precision-cut profiles in MDF, softwood and hardwood
-
Moisture-resistant MDF as standard for lasting performance
-
Smooth, paint-ready finishes on all products
-
Quick delivery and responsive support from a knowledgeable team
-
Made in the UK – with consistency you can trust
Whether you’re working on a single room or a full renovation, our beading profiles help you finish strong.
FAQs
Can I fit beading myself?
Yes. With basic tools and adhesive, most DIYers can fit beading with clean, professional-looking results.
Do I need to use nails or glue for beading?
Adhesive is usually sufficient, especially for MDF or softwood. For hardwood, pins may offer extra hold.
How do you cut beading for corners?
Use a mitre box or saw to cut 45° angles so the corners meet neatly. Always dry-fit before final fixing.
Should I paint beading before or after fitting?
We recommend priming or finishing before installation for ease, then touching up after caulking.
What’s the best beading for skirting boards?
Quadrant or scotia beading is ideal for covering gaps where skirting meets flooring.
Final Thoughts
Beading may be a subtle feature, but it has a big impact on your interior finish. With the right tools and a careful approach, fitting beading is a simple DIY task that can elevate any room.
Explore our wide range of beading profiles in MDF, softwood and hardwood, or get in touch with our team for tailored advice on your next project.


